
Installing window screens without a frame can be a tricky task, but with the right tools and techniques, it can be done successfully. In this article, we will walk you through the step-by-step process of installing a window screen without a frame, ensuring a secure and functional fit. Whether you are a DIY enthusiast or just looking to save money on professional installation, this guide will provide you with all the information you need to get the job done right. So let’s dive in and learn how to install a window screen without a frame.
Tools and Materials Required
Before you embark on this DIY project, you’ll need to gather the necessary tools and materials. Here’s what you’ll need:
Tools:
- Measuring tape
- Utility knife
- Screwdriver
- Corner brackets
- Screen spline roller
Materials:
- Window screen material
- Corner brackets
- Spline (rubber gasket)
- Screen clips
- Screws
- Clear adhesive
How to Install Window Screen Without Frame
Installing a window screen without a frame may seem like a daunting task, but it is actually quite simple. Here is a step-by-step guide on how to do it:
Step 1: Measure Your Window

The first step in installing a window screen without a frame is to accurately measure your window. Use a measuring tape to determine the width and height of your window opening. Make sure to measure from the inside edges of the window frame.
Step 2: Cut the Window Screen Material
Next, use a utility knife to cut the window screen material to the exact size of your window opening. Make sure to leave a little extra material on each side to allow for adjustments.
Step 3: Attach Corner Brackets
Using a screwdriver, attach corner brackets to each corner of the window frame. These brackets will hold the window screen in place.
Step 4: Install Spline
Take the screen spline roller and insert the spline (rubber gasket) into the groove of the corner brackets. Make sure the spline is securely inserted and evenly distributed.
Step 5: Stretch and Secure the Screen Material
Carefully place the cut window screen material over the window opening, making sure it is centered and aligned. Gently stretch the material to remove any wrinkles or sagging. Starting at one corner, use the spline roller to press the screen material into the groove of the corner bracket. Continue this process for each corner, ensuring the screen material is tightly secured.
Step 6: Trim Excess Material
Once the screen material is securely in place, use a utility knife to trim any excess material that extends beyond the corner brackets.
Step 7: Attach Screen Clips
To provide additional support and stability, attach screen clips along the edges of the window frame. Use screws to secure the clips in place, making sure they are evenly spaced.
Step 8: Apply Clear Adhesive
Finally, apply a thin layer of clear adhesive along the edges of the window frame to secure the screen material and prevent it from coming loose.
Step 9: Allow the Adhesive to Dry
Allow the clear adhesive to dry completely before testing the window screen. This will ensure that the screen is securely attached and ready for use.
Why You Might Need a Frameless Window Screen
There are several reasons why you might choose to install a window screen without a frame.
- One common reason is that your window frame may be damaged or incompatible with traditional framed screens. In these cases, a frameless window screen offers a convenient solution.
- Another reason is aesthetics. Some homeowners prefer the sleek, minimalist look of a frameless window screen, as it allows for unobstructed views and a more modern appearance.
- Additionally, frameless window screens can be easier to clean and maintain. Without a frame, there are no crevices or corners for dirt and debris to accumulate, making it easier to keep your screens looking pristine.
How to Clean Window Screens?
Cleaning window screens is an important part of maintaining a clean and healthy home. Over time, window screens can accumulate dirt, dust, and other debris, which can hinder their effectiveness and reduce the amount of natural light that enters your home. Here are some steps to help you clean your window screens effectively:
Step 1: Remove the screens from the windows
Start by removing the window screens from the windows. This can usually be done by lifting the tabs or clips that hold the screens in place. Carefully remove the screens one by one and place them on a clean and flat surface, such as a patio or driveway.
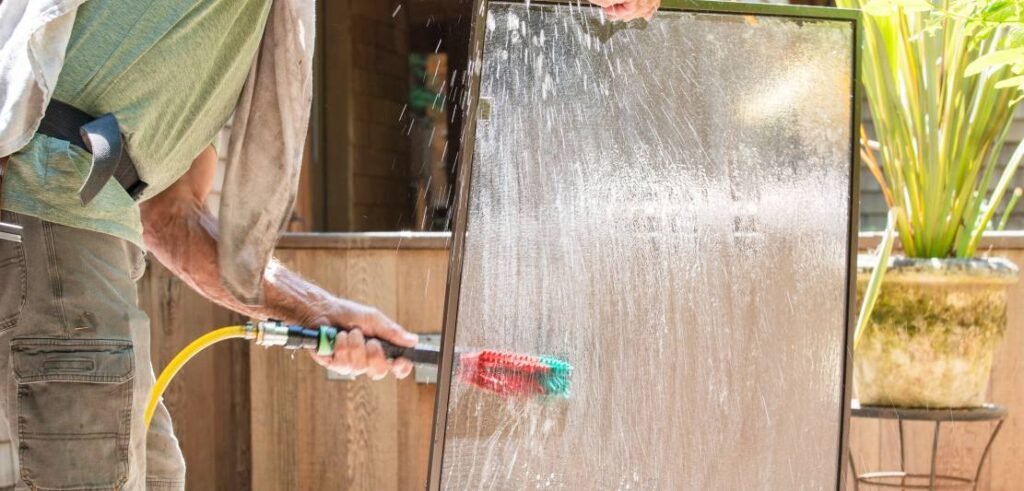
Step 2: Brush off loose dirt and debris
Using a soft-bristle brush or a handheld vacuum cleaner with a brush attachment, gently brush off any loose dirt and debris from the window screens. Pay special attention to the corners and edges where dirt tends to accumulate.
Step 3: Prepare a cleaning solution
Fill a bucket or basin with warm water and add a small amount of mild dish soap or a specialized window screen cleaning solution. Mix the solution until it becomes sudsy.
Step 4: Scrub the screens
Dip a soft sponge or microfiber cloth into the cleaning solution and gently scrub the window screens, working from top to bottom. Pay attention to any stubborn stains or areas that require extra attention. Avoid using abrasive materials or harsh chemicals that could damage the screen material.
Step 5: Rinse with clean water
Once you have scrubbed the screens, rinse them thoroughly with clean water to remove any soap residue. You can use a hose or a bucket of clean water for this step. Make sure to rinse both sides of the screens to ensure they are completely clean.
Step 6: Dry the screens
After rinsing, shake off any excess water from the screens and wipe them with a clean, dry cloth. Place the screens in a sunny and well-ventilated area to air dry completely before reinstalling them.
Common Mistakes to Avoid
- Not measuring the window opening accurately
- Overstretching or tearing the screen material
- Using incorrect materials or tools
- Neglecting regular maintenance
How to Install Window Screen Without Frame- FAQs
Frameless window screens can be effective at keeping bugs out, but they may not provide the same level of protection as traditional framed screens. It is important to ensure a secure fit and check for any gaps or openings that bugs could potentially enter through.
Frameless window screens can be used on most types of windows, including casement, double-hung, and sliding windows. However, it is important to ensure that the screen material and attachment method are suitable for the specific window type.
Closing Remarks
By following these steps, you can easily install a window screen without a frame. Remember to take accurate measurements, secure the screen material tightly, and allow the adhesive to dry properly. With a little patience and attention to detail, you can enjoy the benefits of a frameless window screen in no time.
Read Also: